54 posts tagged with "Javascript Tutorials"

View All Tags

ยท 4 min read

"Create a Stunning Carousel Slider with JavaScript and CSS"

Introductionโ€‹

A carousel slider is a popular component used to display a series of images or content in a rotating fashion.

In this blog article, we'll guide you through the process of building a simple and stylish carousel slider using JavaScript and CSS.

You'll learn how to create a responsive and interactive slider that transitions smoothly between slides.

We'll also show you how to add navigation buttons to the slider and how to make the slider automatically rotate through the slides.

Suggested Tutorials ๐Ÿ“‘:โ€‹

Let's get started! (โยดโ—ก`โ)

1. HTML Structureโ€‹

Start by setting up the basic HTML structure for your carousel slider. Create a container to hold the slides and navigation buttons.


<!DOCTYPE html>
<html>
<head>
<title>Carousel Slider</title>
<link rel="stylesheet" href="styles.css">
</head>
<body>
<div class="carousel-container">
<div class="carousel">
<div class="slide">
<img src="image1.jpg" alt="Slide 1">
</div>
<div class="slide">
<img src="image2.jpg" alt="Slide 2">
</div>
<div class="slide">
<img src="image3.jpg" alt="Slide 3">
</div>
</div>
<button class="prev-button">&#10094;</button>
<button class="next-button">&#10095;</button>
</div>
<script src="script.js"></script>
</body>
</html>

2. CSS Stylingโ€‹

Create a styles.css file to style the carousel and slides.


body {
font-family: Arial, sans-serif;
margin: 0;
padding: 0;
}

.carousel-container {
position: relative;
max-width: 800px;
margin: 0 auto;
overflow: hidden;

}

.carousel {
display: flex;
transition: transform 0.5s ease-in-out;
}

.slide {
flex: 0 0 100%;
display: flex;
align-items: center;
}

img {
max-width: 100%;
height: auto;
}

.prev-button,
.next-button {
position: absolute;
top: 50%;
transform: translateY(-50%);
font-size: 24px;
background: none;
border: none;
cursor: pointer;
}

.prev-button {
left: 10px;
}

.next-button {
right: 10px;
}

Suggested Tutorials ๐Ÿ“‘:โ€‹

3. JavaScript Functionalityโ€‹

Create a script.js file to add functionality to the carousel slider.

const carousel = document.querySelector('.carousel');
const slides = document.querySelectorAll('.slide');
const prevButton = document.querySelector('.prev-button');
const nextButton = document.querySelector('.next-button');

let currentIndex = 0;

// Function to show the current slide
function showSlide(index) {
carousel.style.transform = `translateX(-${index * 100}%)`;
}

// Event listeners for prev and next buttons
prevButton.addEventListener('click', () => {
currentIndex = (currentIndex - 1 + slides.length) % slides.length;
showSlide(currentIndex);
});

nextButton.addEventListener('click', () => {
currentIndex = (currentIndex + 1) % slides.length;
showSlide(currentIndex);
});

// Initial slide
showSlide(currentIndex);

4. Making It Responsiveโ€‹

To make the carousel slider responsive, add media queries to adjust the slide layout based on screen size.


@media screen and (max-width: 768px) {
.slide {
flex: 0 0 100%;
}
}

@media screen and (max-width: 480px) {
.carousel-container {
max-width: 100%;
}
}

Suggested Tutorials ๐Ÿ“‘:โ€‹

Conclusionโ€‹

Congratulations! ๐Ÿฅณ You've successfully built a responsive carousel slider using JavaScript and CSS.

We hope you enjoyed this tutorial and found it useful.

Happy coding! ๐Ÿ˜Š

ยท 4 min read

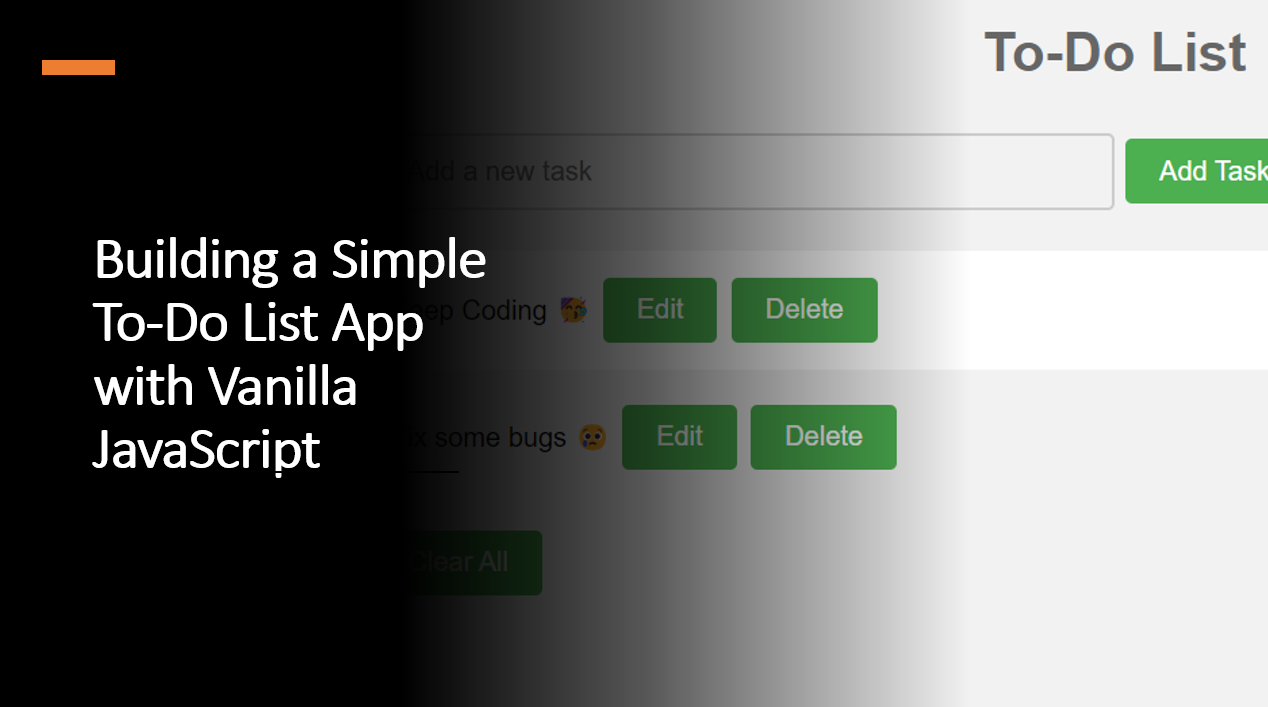
&quot;Building a Simple To-Do List App with Vanilla JavaScript&quot;

Introductionโ€‹

Creating a to-do list app is a great way to practice your JavaScript skills and build a useful application. In this blog article, we will learn how to build a simple to-do list app with vanilla JavaScript.

Suggested Tutorials ๐Ÿ“‘:โ€‹

Let's get started! ๐Ÿš€

1. HTML Structureโ€‹

Let's start by creating the HTML structure for our to-do list app.

Start by setting up the basic HTML structure for your to-do list app. Create an input field for adding tasks, an unordered list (<ul>) to display tasks, and a "Clear All" button to remove all tasks.

<!DOCTYPE html>
<html>
<head>
<title>To-Do List App</title>
</head>
<body>
<h1>To-Do List</h1>
<input type="text" id="taskInput" placeholder="Add a new task">
<button id="addTaskButton">Add Task</button>
<ul id="taskList"></ul>
<button id="clearAllButton">Clear All</button>
<script src="app.js"></script>
</body>
</html>

2. CSS Stylingโ€‹

Next, let's add some CSS styling to our to-do list app.


body {
font-family: Arial, Helvetica, sans-serif;
background-color: #f2f2f2;
}

h1 {
text-align: center;
color: #666666;
}

input[type=text] {
width: 50%;
padding: 12px 20px;
margin: 8px 0;
box-sizing: border-box;
border: 2px solid #ccc;
border-radius: 4px;
background-color: #f2f2f2;
font-size: 16px;
}

input[type=text]:focus {
border: 3px solid #555;
}

button {
background-color: #4CAF50;
border: none;
color: white;
padding: 10px 20px;
text-align: center;
text-decoration: none;
display: inline-block;
font-size: 16px;
margin: 4px 2px;
cursor: pointer;
border-radius: 4px;
}

button:hover {
opacity: 0.8;
}

#taskList {
list-style-type: none;
padding: 0;
}

#taskList li {
background-color: #ffffff;
padding: 12px;
margin-bottom: 5px;
border-radius: 4px;
}

#taskList li:nth-child(even) {
background-color: #f2f2f2;
}

#taskList li:hover {
background-color: #ddd;
cursor: pointer;

}

#taskList li.checked {
background-color: #888888;
color: #ffffff;
text-decoration: line-through;
}

#taskList li.checked:hover {
background-color: #555555;
}

Suggested Tutorials ๐Ÿ“‘:โ€‹

3. JavaScript Logicโ€‹

Now that we have the HTML and CSS in place, let's add the JavaScript logic to our to-do list app.


const taskInput = document.getElementById('taskInput');
const addTaskButton = document.getElementById('addTaskButton');
const taskList = document.getElementById('taskList');
const clearAllButton = document.getElementById('clearAllButton');

// Function to add a new task
function addTask() {
const taskText = taskInput.value;
if (taskText.trim() === '') return;

const taskItem = document.createElement('li');
taskItem.innerHTML = `
<span>${taskText}</span>
<button class="editButton">Edit</button>
<button class="deleteButton">Delete</button>
`;
taskList.appendChild(taskItem);

taskInput.value = '';
}

// Function to edit a task
function editTask(taskItem) {
const newText = prompt('Edit task:', taskItem.firstChild.textContent);
if (newText !== null) {
taskItem.firstChild.textContent = newText;
}
}

// Function to delete a task
function deleteTask(taskItem) {
taskList.removeChild(taskItem);
}

// Event listeners
addTaskButton.addEventListener('click', addTask);
taskList.addEventListener('click', (event) => {
const target = event.target;
const taskItem = target.parentNode;

if (target.classList.contains('editButton')) {
editTask(taskItem);
} else if (target.classList.contains('deleteButton')) {
deleteTask(taskItem);
}
});
clearAllButton.addEventListener('click', () => {
taskList.innerHTML = '';
});

Suggested Tutorials ๐Ÿ“‘:โ€‹

Conclusionโ€‹

Congratulations! ๐Ÿฅณ You've successfully built a simple to-do list app using vanilla JavaScript.

You learned how to add tasks, edit tasks, delete tasks. This project demonstrates fundamental concepts in web development, such as DOM manipulation, event handling, and data persistence.

We hope you enjoyed this blog article.

Happy coding! ๐ŸŽ‰

ยท 6 min read

&quot;JavaScript Best Practices: Clean Code Tips for Beginners&quot;

Introductionโ€‹

Writing clean and maintainable JavaScript code is essential for creating successful and scalable web applications. Clean code improves readability, reduces bugs, and enhances collaboration among team members.

In this blog post, we will learn about some of the best practices for writing clean JavaScript code and we will also learn about some of the common mistakes that beginners make and how to avoid them.

Suggested Tutorials ๐Ÿ“‘:โ€‹

Let's explore JavaScript Best Practices: Clean Code Tips for Beginners.

1. Use Meaningful Namesโ€‹

The first step to writing clean code is to use meaningful names for variables, functions, and classes. The names should be descriptive and should convey the purpose of the variable, function, or class.

For example, if you are writing a function to calculate the area of a circle, you can name it calculateCircleArea instead of calcArea. Similarly, if you are writing a function to calculate the area of a rectangle, you can name it calculateRectangleArea instead of calcArea.

As an example:


// Bad Practice

function calcArea(radius) {
return Math.PI * radius ** 2;
}

// Good Practice

function calculateCircleArea(radius) {
return Math.PI * radius ** 2;
}

2. Follow Consistent Indentation and Formattingโ€‹

Consistent indentation and formatting make your code more readable and easier to understand. It also helps you to avoid syntax errors and bugs.

For example, if you are using tabs for indentation, you should use tabs for indentation throughout your code. Similarly, if you are using spaces for indentation, you should use spaces for indentation throughout your code.

As an example:


// Bad Practice

function calculateCircleArea(radius) {
return Math.PI * radius ** 2;
}

// Good Practice

function calculateCircleArea(radius) {
return Math.PI * radius ** 2;
}

Suggested Tutorials ๐Ÿ“‘:โ€‹

3. Use Comments to Explain Your Codeโ€‹

Comments are a great way to explain your code and make it easier to understand. They also help you to avoid bugs and errors.

For example, if you are writing a function to calculate the area of a circle, you can add a comment to explain how the function works.

As an example:


// Bad Practice

function calculateCircleArea(radius) {
return Math.PI * radius ** 2;
}

// Good Practice

// This function calculates the area of a circle.

function calculateCircleArea(radius) {
return Math.PI * radius ** 2;
}

4. Avoid Global Variablesโ€‹

Global variables are variables that are accessible from anywhere in your code. They are usually declared outside of any function or class.

Global variables can cause problems because they can be modified by any function or class. This can lead to unexpected behavior and bugs.

For example, if you are writing a function to calculate the area of a circle, you should not use a global variable to store the radius of the circle. Instead, you should pass the radius as a parameter to the function.

As an example:


// Bad Practice

let radius = 5;

function calculateCircleArea() {
return Math.PI * radius ** 2;
}

// Good Practice

function calculateCircleArea(radius) {
return Math.PI * radius ** 2;
}

Suggested Tutorials ๐Ÿ“‘:โ€‹

5. Handle Errors Properlyโ€‹

Handling errors properly is essential for writing clean and maintainable JavaScript code. It helps you to avoid bugs and errors.

For example, if you are writing a function to calculate the area of a circle, you should handle the case where the radius is negative or zero.

As an example:


// Bad Practice

function calculateCircleArea(radius) {
return Math.PI * radius ** 2;
}

// Good Practice

function calculateCircleArea(radius) {
if (radius <= 0) {
throw new Error('Radius must be positive');
}

return Math.PI * radius ** 2;
}

6. Avoid Magic Numbers and Stringsโ€‹

Magic numbers and strings are numbers and strings that appear in your code without any explanation. They are usually hard to understand and can lead to bugs and errors.

For example, if you are writing a function to calculate the area of a circle, you should not use the number 3.14 in your code. Instead, you should use the constant Math.PI.

As an example:


// Bad Practice

function calculateCircleArea(radius) {
return 3.14 * radius ** 2;
}

// Good Practice

function calculateCircleArea(radius) {
return Math.PI * radius ** 2;
}

Suggested Tutorials ๐Ÿ“‘:โ€‹

7. Use Functional Programming Techniquesโ€‹

Leverage functional programming concepts like map, filter, and reduce to write clean and concise code. Functional programming promotes immutability and reduces side effects, leading to more predictable code.

As an example:


// Bad Practice
const numbers = [1, 2, 3];
const doubledNumbers = [];

for (let i = 0; i < numbers.length; i++) {
doubledNumbers.push(numbers[i] * 2);
}

// Good Practice
const numbers = [1, 2, 3];
const doubledNumbers = numbers.map(num => num * 2);

8. Use Arrow Functionsโ€‹

Arrow functions are a great way to write clean and concise code. They are also easier to read and understand.

As an example:


// Bad Practice

function calculateCircleArea(radius) {
return Math.PI * radius ** 2;
}

// Good Practice

const calculateCircleArea = radius => Math.PI * radius ** 2;

Suggested Tutorials ๐Ÿ“‘:โ€‹

Conclusionโ€‹

In this blog post, we learned about some of the best practices for writing clean JavaScript code. We also learned about some of the common mistakes that beginners make and how to avoid them.

We hope you found this blog post helpful.

Happy coding! ๐Ÿ˜ƒ

ยท 8 min read

&quot;Master API Requests in JavaScript with Fetch and Async/Await&quot;

Introductionโ€‹

Fetching data from APIs is a common task in modern web development. JavaScript provides different methods to handle API requests, and two popular approaches are using the fetch() function and the async/await.

In this blog article, we will learn how to make API requests using the fetch() function and the async/await.

What is the Fetch API?โ€‹

The Fetch API is a modern interface that allows you to make HTTP requests to servers from web browsers.

It is a replacement for the older XMLHttpRequest (XHR) object. The Fetch API provides a JavaScript interface for accessing and manipulating parts of the HTTP pipeline, such as requests and responses. It also provides a global fetch() method that provides an easy, logical way to fetch resources asynchronously across the network.

Suggested Tutorials ๐Ÿ“‘:โ€‹

1. Making API Requests with fetch()โ€‹

The fetch() function is a modern way to make HTTP requests. It is a promise-based API that returns a promise that resolves to a Response object. The Response object represents the response to the request made by the fetch() function. It has properties that allow you to access the response data and metadata.

1.1. Making a GET Requestโ€‹

Matking a GET request using the fetch() function is very simple. You just need to pass the URL of the resource you want to fetch as an argument to the fetch() function. The fetch() function returns a promise that resolves to a Response object. You can use the Response object to access the response data and metadata.

Let's see an example of making a GET request using the fetch() function.


fetch('https://jsonplaceholder.typicode.com/posts')
.then((response) => response.json())
.then((data) => console.log(data));

In the above example

  • We are making a GET request to the https://jsonplaceholder.typicode.com/posts endpoint.
  • The fetch() function returns a promise that resolves to a Response object.
  • We are using the Response object to access the response data and metadata.
  • We are using the json() method of the Response object to parse the response data as JSON.
  • We are using the then() method of the Promise object to access the parsed response data.

1.2. Making a POST Requestโ€‹

Making a POST request using the fetch() function is very similar to making a GET request. You just need to pass the URL of the resource you want to fetch as an argument to the fetch() function. The fetch() function returns a promise that resolves to a Response object. You can use the Response object to access the response data and metadata.

Let's see an example of making a POST request using the fetch() function.


fetch('https://jsonplaceholder.typicode.com/posts', {
method: 'POST',
body: JSON.stringify({
title: 'foo',
body: 'bar',
userId: 1,
}),
headers: {
'Content-type': 'application/json; charset=UTF-8',
},
})
.then((response) => response.json())
.then((data) => console.log(data));

In the above example

  • We are making a POST request to the https://jsonplaceholder.typicode.com/posts endpoint.
  • We are passing the request body as an argument to the fetch() function.
  • We are using the json() method of the Response object to parse the response data as JSON.
  • We are using the then() method of the Promise object to access the parsed response data.

2. Making API Requests with Async/Awaitโ€‹

The async/await syntax is a modern way to make HTTP requests. It is a promise-based API that returns a promise that resolves to a Response object. The Response object represents the response to the request made by the fetch() function. It has properties that allow you to access the response data and metadata.

Suggested Tutorials ๐Ÿ“‘:โ€‹

2.1. Making a GET Requestโ€‹

Matking a GET request using the async/await syntax is very simple. You just need to pass the URL of the resource you want to fetch as an argument to the fetch() function. The fetch() function returns a promise that resolves to a Response object. You can use the Response object to access the response data and metadata.

Let's see an example of making a GET request using the async/await syntax.


const response = await fetch('https://jsonplaceholder.typicode.com/posts');
const data = await response.json();
console.log(data);

In the above example

  • We are making a GET request to the https://jsonplaceholder.typicode.com/posts endpoint.
  • The fetch() function returns a promise that resolves to a Response object.
  • We are using the Response object to access the response data and metadata.
  • We are using the json() method of the Response object to parse the response data as JSON.
  • We are using the await keyword to wait for the promise to resolve.

2.2. Making a POST Requestโ€‹

Making a POST request using the async/await syntax is very similar to making a GET request. You just need to pass the URL of the resource you want to fetch as an argument to the fetch() function. The fetch() function returns a promise that resolves to a Response object. You can use the Response object to access the response data and metadata.

Let's see an example of making a POST request using the async/await syntax.


const response = await fetch('https://jsonplaceholder.typicode.com/posts', {
method: 'POST',
body: JSON.stringify({
title: 'foo',
body: 'bar',
userId: 1,
}),
headers: {
'Content-type': 'application/json; charset=UTF-8',
},
});

const data = await response.json();

console.log(data);

In the above example

  • We are making a POST request to the https://jsonplaceholder.typicode.com/posts endpoint.
  • We are passing the request body as an argument to the fetch() function.
  • We are using the json() method of the Response object to parse the response data as JSON.
  • We are using the await keyword to wait for the promise to resolve.

3. Handling Errorsโ€‹

When making API requests, it is important to handle errors. The fetch() function and the async/await syntax provide different ways to handle errors.

Suggested Tutorials ๐Ÿ“‘:โ€‹

3.1. Handling Errors with fetch()โ€‹

The fetch() function returns a promise that resolves to a Response object. The Response object has a ok property that indicates whether the request was successful or not. If the request was successful, the ok property will be set to true. If the request was not successful, the ok property will be set to false. You can use the ok property to check if the request was successful or not.

Let's see an example of handling errors with the fetch() function.


fetch('https://jsonplaceholder.typicode.com/posts')
.then((response) => {
if (response.ok) {
return response.json();
} else {
throw new Error('Something went wrong');
}
})
.then((data) => console.log(data))
.catch((error) => console.log(error));

In the above example

  • We are making a GET request to the https://jsonplaceholder.typicode.com/posts endpoint.
  • We are using the ok property of the Response object to check if the request was successful or not.
  • If the request was successful, we are using the json() method of the Response object to parse the response data as JSON.
  • If the request was not successful, we are throwing an error.
  • We are using the then() method of the Promise object to access the parsed response data.
  • We are using the catch() method of the Promise object to handle errors.

3.2. Handling Errors with Async/Awaitโ€‹

The async/await syntax provides a way to handle errors using the try...catch statement. The try...catch statement allows you to catch errors that occur inside the try block. You can use the try...catch statement to catch errors that occur inside the await expression.

Let's see an example of handling errors with the async/await syntax.


try {
const response = await fetch('https://jsonplaceholder.typicode.com/posts');
const data = await response.json();
console.log(data);
} catch (error) {
console.log(error);
}

In the above example

  • We are making a GET request to the https://jsonplaceholder.typicode.com/posts endpoint.
  • We are using the await keyword to wait for the promise to resolve.
  • We are using the try...catch statement to catch errors that occur inside the await expression.
  • We are using the json() method of the Response object to parse the response data as JSON.
  • We are using the catch() method of the Promise object to handle errors.

Suggested Tutorials ๐Ÿ“‘:โ€‹

Conclusionโ€‹

In this tutorial, we have learned how to make API requests using the fetch() function and the async/await syntax. We have also learned how to handle errors when making API requests.

We hope you found this blog post helpful.

If you have any questions or feedback, please feel free to send us a message on Twitter. We would love to hear from you.

Happy coding! ๐Ÿš€

ยท 6 min read

&quot;A Complete Guide to Local Storage and Session Storage in JavaScript&quot;

Introductionโ€‹

Local Storage and Session Storage are two web storage mechanisms provided by modern browsers to store data on the client-side. They offer a simple and efficient way to save key-value pairs in the user's browser.

In this blog post we will learn how to use Local Storage and Session Storage in JavaScript. We will also learn about the differences between the two storage mechanisms and when to use them.

Suggested Tutorials ๐Ÿ“‘:โ€‹

Let's get started.

1. What is Local Storage?โ€‹

Local Storage is a web storage mechanism that allows you to store data in the user's browser. It is a simple key-value store that can be used to save data on the client-side.

Local Storage is persistent, which means that the data stored in it will be available even after the browser is closed. It is also secure, which means that the data stored in it cannot be accessed by other websites.

1.1 How to use Local Storage?โ€‹

Local Storage is a global object that is available in the browser. It has a setItem() method that can be used to store data in the browser. The data is stored as a key-value pair.

As an example:


localStorage.setItem('name', 'John Doe');

In this example:

  • The setItem() method is used to store the value John Doe in the key name in the Local Storage.
  • The setItem() method takes two arguments: the key and the value.

1.2 How to get data from Local Storage?โ€‹

Local Storage has a getItem() method that can be used to get data from the browser. The data is retrieved as a string.

As an example:


const name = localStorage.getItem('name');

In this example:

  • The getItem() method is used to get the value stored in the key name in the Local Storage.

1.3 How to remove data from Local Storage?โ€‹

Local Storage has a removeItem() method that can be used to remove data from the browser.

As an example:


localStorage.removeItem('name');

In this example:

  • The removeItem() method is used to remove the value stored in the key name in the Local Storage.

1.4 How to clear Local Storage?โ€‹

Local Storage has a clear() method that can be used to clear all the data stored in the browser.

As an example:


localStorage.clear();

In this example:

  • The clear() method is used to clear all the data stored in the Local Storage.

Suggested Tutorials ๐Ÿ“‘:โ€‹

2. What is Session Storage?โ€‹

Session Storage is a web storage mechanism that allows you to store data in the user's browser. It is a simple key-value store that can be used to save data on the client-side.

Session Storage is not persistent, which means that the data stored in it will be lost when the browser is closed. It is also secure, which means that the data stored in it cannot be accessed by other websites.

2.1 How to use Session Storage?โ€‹

Session Storage is a global object that is available in the browser. It has a setItem() method that can be used to store data in the browser. The data is stored as a key-value pair.

As an example:


sessionStorage.setItem('name', 'John Doe');

In this example:

  • The setItem() method is used to store the value John Doe in the key name in the Session Storage.
  • The setItem() method takes two arguments: the key and the value.

2.2 How to get data from Session Storage?โ€‹

Session Storage has a getItem() method that can be used to get data from the browser. The data is retrieved as a string.

As an example:


const name = sessionStorage.getItem('name');

In this example:

  • The getItem() method is used to get the value stored in the key name in the Session Storage.

2.3 How to remove data from Session Storage?โ€‹

Session Storage has a removeItem() method that can be used to remove data from the browser.

As an example:


sessionStorage.removeItem('name');

In this example:

  • The removeItem() method is used to remove the value stored in the key name in the Session Storage.

2.4 How to clear Session Storage?โ€‹

Session Storage has a clear() method that can be used to clear all the data stored in the browser.

As an example:


sessionStorage.clear();

In this example:

  • The clear() method is used to clear all the data stored in the Session Storage.

Suggested Tutorials ๐Ÿ“‘:โ€‹

Conclusionโ€‹

In this blog post we learned how to use Local Storage and Session Storage in JavaScript. We also learned about the differences between the two storage mechanisms and when to use them.

I hope you found this blog post useful.

Happy Coding! ๐Ÿ˜‡

ยท 5 min read

&quot;Choosing the Right Animation Technique: CSS Transitions vs. JavaScript Animation&quot;

Introductionโ€‹

Animations add visual appeal and interactivity to web pages, enhancing the overall user experience. When it comes to animating elements on a webpage, developers have two primary approaches: CSS transitions and JavaScript animations.

In this blog post, we will explore the differences between CSS transitions and JavaScript animations, and discuss the advantages and use cases of each method.

Understanding the strengths of each approach will help you make informed decisions on when to use CSS transitions or JavaScript animations in your projects.

Suggested Tutorials ๐Ÿ“‘:โ€‹

Letโ€™s get started!

What are CSS Transitions?โ€‹

CSS transitions are a simple way to animate HTML elements. They allow you to change the CSS properties of an element over a specified duration. CSS transitions are triggered by changes in an elementโ€™s state, such as when it is hovered over or clicked on.

What are JavaScript Animations?โ€‹

JavaScript animations are a more complex way to animate HTML elements. They allow you to change the CSS properties of an element over a specified duration. JavaScript animations are triggered by JavaScript code, which can be executed at any time, regardless of the elementโ€™s state.

1. CSS Transitionsโ€‹

CSS transitions allow smooth and straightforward animations without the need for JavaScript code. Transitions are based on property changes, and you can define the animation duration and easing function with CSS.

As an example:

/* CSS Transition Example */
.element {
width: 100px;
height: 100px;
background-color: blue;
transition: width 1s ease-in-out;
}

.element:hover {
width: 200px;
}

In this example:

  • The elementโ€™s width is set to 100px by default.
  • When the element is hovered over, its width is changed to 200px.
  • The transition property specifies that the width change should take 1 second and use an ease-in-out easing function.

Advantages of CSS Transitionsโ€‹

  • Simple implementation with minimal code.
  • Hardware acceleration: Modern browsers can optimize CSS transitions, resulting in smoother animations and reduced CPU usage.
  • Automatic handling of animation timing and easing functions, making it easy to create smooth effects.

Use Cases for CSS Transitionsโ€‹

  • Simple hover effects and state changes.
  • Smooth property transitions like color changes, size adjustments, and opacity modifications.

Suggested Tutorials ๐Ÿ“‘:โ€‹

2. JavaScript Animationsโ€‹

JavaScript animations involve changing element properties using JavaScript code. This approach provides more control and flexibility over animations, making it suitable for complex and interactive animations.

As an example:

// JavaScript Animation Example (using the Web Animations API)

const element = document.getElementById('myElement');

element.animate(
{ width: ['100px', '200px'] },
{ duration: 1000, easing: 'ease-in-out' }
);

In this example:

  • The elementโ€™s width is set to 100px by default.
  • When the element is hovered over, its width is changed to 200px.
  • The transition property specifies that the width change should take 1 second and use an ease-in-out easing function.

Advantages of JavaScript Animationsโ€‹

  • More control over animations, allowing you to create complex and interactive effects.
  • Ability to trigger animations at any time, regardless of the elementโ€™s state.
  • Ability to create custom easing functions.
  • Cross-browser support with JavaScript libraries like GSAP (GreenSock Animation Platform).

Use Cases for JavaScript Animationsโ€‹

  • Advanced animations requiring dynamic property changes or user interaction.
  • Animations with complex sequences or chained effects.
  • Custom animations not achievable with CSS transitions alone.

3. Performance Considerationsโ€‹

When it comes to performance, CSS transitions are generally faster than JavaScript animations. This is because CSS transitions are hardware-accelerated by default, while JavaScript animations are not. However, JavaScript animations can be optimized for performance by using the Web Animations API or a JavaScript animation library like GSAP.

Suggested Tutorials ๐Ÿ“‘:โ€‹

Conclusionโ€‹

In this blog post, we explored the differences between CSS transitions and JavaScript animations. We also discussed the advantages and use cases of each method. Understanding the strengths of each approach will help you make informed decisions on when to use CSS transitions or JavaScript animations in your projects.

We hope you found this article helpful!.

Happy Coding! ๐Ÿš€

ยท 7 min read

&quot;JavaScript Error Handling: A Guide to Try-Catch and Error Objects&quot;

Introductionโ€‹

Error handling is a crucial aspect of writing robust and reliable JavaScript code. Unexpected errors can occur during the execution of a program, and proper error handling ensures that these errors are caught, identified, and gracefully handled.

In this guide, we will explore JavaScript error handling using the try-catch statement and the Error object.

Understanding error handling will help you build more resilient and user-friendly apps.

Suggested Tutorials ๐Ÿ“‘:โ€‹

Let's start explore the basics of error handling in JavaScript.

What is Error Handling?โ€‹

Error handling is the process of identifying, catching, and responding to errors in a program.

JavaScript provides several mechanisms for handling errors, including the try-catch statement and the Error object.

1. The try-catch Statementโ€‹

The try-catch statement allows you to attempt a block of code and catch any errors that might occur during its execution. The try block contains the code that you want to test, and the catch block handles any errors that arise.

The catch block is only executed if an error occurs in the try block.

The following syntax illustrates the try-catch statement:


try {
// code to test
} catch (error) {
// handle error
}

In this example:

  • The try block contains the code that you want to test.
  • The catch block is executed if an error occurs in the try block.
  • The error parameter is the error object that contains information about the error.

2. The Error Objectโ€‹

When an error occurs, JavaScript automatically creates an Error object that contains information about the error, such as the error message and the stack trace. The catch block receives this Error object as its parameter, allowing you to access and process error details.

The following example illustrates the Error object:


try {
// code to test
} catch (error) {
console.log(error.message);
console.log(error.stack);
}

In this example:

  • The error.message property contains the error message.
  • The error.stack property contains the stack trace.

Suggested Tutorials ๐Ÿ“‘:โ€‹

3. Custom Errorsโ€‹

JavaScript also allows you to create custom errors using the Error object. You can use custom errors to provide more information about the error and to distinguish between different types of errors.

The following example illustrates how to create a custom error:


class CustomError extends Error {
constructor(message) {
super(message);
this.name = 'CustomError';
}
}

try {
throw new CustomError('This is a custom error message.');
} catch (error) {
console.error(error.name); // Output: "CustomError"
console.error(error.message); // Output: "This is a custom error message."
}

In this example:

  • we created a custom error by extending the Error object. The CustomError class inherits the Error class and adds a custom error name.
  • We then threw an instance of the CustomError class in the try block and caught it in the catch block.

4. The finally Blockโ€‹

The finally block is executed regardless of whether an error occurs in the try block.

finally block is useful for performing cleanup tasks, such as closing database connections or releasing resources.

The following example illustrates the finally block:


try {
// Code that may cause an error
} catch (error) {
// Code to handle the error
} finally {
// Code that always executes
}

In this example:

  • The try block contains the code that may cause an error.
  • The catch block handles the error.
  • The finally block contains the code that always executes.

Suggested Tutorials ๐Ÿ“‘:โ€‹

5. The throw Statementโ€‹

The throw statement allows you to throw an error. You can throw any value, but it is recommended to throw an instance of the Error object.

The following example illustrates the throw statement:


try {
throw new Error('This is an error message.');
} catch (error) {
console.error(error.message); // Output: "This is an error message."
}

In this example:

  • We threw an instance of the Error object in the try block.
  • The catch block caught the error and displayed the error message.

6. Error Typesโ€‹

JavaScript provides several built-in error types, including EvalError, RangeError, ReferenceError, SyntaxError, TypeError, and URIError. Each error type has its own error message and properties.

6.1. EvalErrorโ€‹

The EvalError error occurs when the eval() function is used incorrectly. The EvalError error is not used in modern JavaScript, and it is only included for compatibility with older browsers.

As an example:


try {
eval('alert("Hello World")');
} catch (error) {
console.error(error.message); // Output: "EvalError: alert is not defined"
}

6.2. RangeErrorโ€‹

The RangeError error occurs when a value is not in the expected range. For example, the RangeError error occurs when you use the Number.toExponential() method with a value that is out of range.

As an example:


try {
const number = 1.23456789;
number.toExponential(-1);
} catch (error) {
console.error(error.message); // Output: "RangeError: toExponential() argument must be between 0 and 100"
}

6.3. ReferenceErrorโ€‹

The ReferenceError error occurs when you use a variable that is not defined. For example, the ReferenceError error occurs when you use a variable that is not declared.

As an example:


try {
console.log(x);
} catch (error) {
console.error(error.message); // Output: "ReferenceError: x is not defined"
}

6.4. SyntaxErrorโ€‹

The SyntaxError error occurs when you use invalid syntax. For example, the SyntaxError error occurs when you use an invalid regular expression.

As an example:


try {
const regex = new RegExp('\\');
} catch (error) {
console.error(error.message); // Output: "SyntaxError: Invalid regular expression: \ at end of pattern"
}

6.5. TypeErrorโ€‹

The TypeError error occurs when you use a value of the wrong type. For example, the TypeError error occurs when you use a string method on a number.

As an example:


try {
const number = 123;
number.toUpperCase();
} catch (error) {
console.error(error.message); // Output: "TypeError: number.toUpperCase is not a function"
}

6.6. URIErrorโ€‹

The URIError error occurs when you use invalid URI syntax. For example, the URIError error occurs when you use an invalid URI.

As an example:


try {
decodeURI('%');
} catch (error) {
console.error(error.message); // Output: "URIError: URI malformed"
}

Conclusionโ€‹

In this article, we have learned about JavaScript error handling. We have also learned about the try...catch statement, the Error object, custom errors, the finally block, the throw statement, and error types and their use cases.

Suggested Tutorials ๐Ÿ“‘:โ€‹

We hope you found this article helpful.

Happy coding! ๐Ÿ˜‡

ยท 7 min read

&quot;Best Practices for Effective Form Validation in JavaScript&quot;

Introductionโ€‹

Form validation is important for web development. It ensures that user input is valid and improves the user experience.

JavaScript can be used to implement form validation on the client-side, providing real-time feedback to users as they interact with forms.

In this blog post, we will explore best practices for handling form validation in JavaScript, covering essential techniques to validate user input, prevent erroneous submissions, and deliver a seamless form-filling experience.

Suggested Tutorials ๐Ÿ“‘:โ€‹

Let's get started!

Why is Form Validation Important?โ€‹

Form validation is a process of verifying that user input is correct and complete before submitting it to the server. It is a critical aspect of web development that ensures data integrity and improves user experience.

Let's start explore best practices for handling form validation in JavaScript, covering essential techniques to validate user input, prevent erroneous submissions, and deliver a seamless form-filling experience.

1. Client-Side and Server-Side Validationโ€‹

Client-side validation in JavaScript provides instant feedback to users, catching common errors before submitting data to the server.

However, it's essential to supplement client-side validation with server-side validation to ensure data integrity and security. Server-side validation acts as a final line of defense, preventing malicious or improperly validated data from being processed on the server.

2. Use HTML5 Input Types and Attributesโ€‹

Use HTML5 input types and attributes (e.g., required, type, min, max, pattern) to validate forms without JavaScript. HTML5 validation works with JavaScript validation and provides a backup for browsers that don't support JavaScript.

HTML5 introduced a range of new input types and attributes that make form validation easier than ever. These include:

  • required - specifies that an input field must be filled out before submitting the form
  • min - specifies the minimum value for an input field
  • max - specifies the maximum value for an input field
  • minlength - specifies the minimum number of characters for an input field
  • maxlength - specifies the maximum number of characters for an input field
  • pattern - specifies a regular expression that an input field's value must match
  • type="email" - specifies that an input field must be an email address
  • type="url" - specifies that an input field must be a URL
  • type="number" - specifies that an input field must be a number
  • type="date" - specifies that an input field must be a date
  • type="tel" - specifies that an input field must be a telephone number
  • type="password" - specifies that an input field must be a password

Suggested Tutorials ๐Ÿ“‘:โ€‹

3. Validate on Form Submissionโ€‹

Use the form's submit event to trigger form validation. Validate the form fields when the user attempts to submit the form, and prevent form submission if validation fails.

You can use the event.preventDefault() method to stop the form from being submitted.

As an example:

const form = document.getElementById('myForm');

form.addEventListener('submit', (event) => {
if (!validateForm()) {
event.preventDefault();
}
});

In this example:

  • The submit event is attached to the form element using the addEventListener() method.
  • The validateForm() function is called when the user attempts to submit the form.
  • The event.preventDefault() method is used to prevent the form from being submitted if validation fails.

4. Real-Time Validation with Input Eventsโ€‹

For enhanced user experience, consider providing real-time validation as users fill in the form.

Use the input or change event to trigger validation on individual form fields as the user types or modifies the input.

As an example:


const nameInput = document.getElementById('name');

nameInput.addEventListener('input', () => {
validateName();
});

In this example:

  • The input event is attached to the name input field using the addEventListener() method.
  • The validateName() function is called when the user types or modifies the input.
  • The validateName() function validates the name input field and displays an error message if validation fails.

Suggested Tutorials ๐Ÿ“‘:โ€‹

5. Validate on Blur Eventsโ€‹

Use the blur event to trigger validation when the user leaves a form field. This provides instant feedback to users as they fill in the form, catching common errors before submitting the form.

As an example:


const nameInput = document.getElementById('name');

nameInput.addEventListener('blur', () => {
validateName();
});

In this example:

  • The blur event is attached to the name input field using the addEventListener() method.

6. Displaying Error Messagesโ€‹

Provide clear and concise error messages when validation fails. Display the error messages near the corresponding form fields, making it easy for users to identify and correct their mistakes.

7. Regular Expressions for Complex Validationโ€‹

Regular expressions (regex) are powerful tools for handling complex form validation requirements. Use regex patterns to enforce specific input formats, such as email addresses, phone numbers, or passwords.

As an example:


const emailInput = document.getElementById('email');

function validateEmail() {
const email = emailInput.value;
const regex = /^[^\s@]+@[^\s@]+\.[^\s@]+$/;
if (!regex.test(email)) {
showError(emailInput, 'Email is not valid.');
return false;
} else {
showSuccess(emailInput);
return true;
}
}

In this example:

  • The regex.test() method is used to test if the email input field's value matches the regex pattern.
  • The showError() function is called to display an error message if validation fails.
  • The showSuccess() function is called to display a success message if validation succeeds.

Suggested Tutorials ๐Ÿ“‘:โ€‹

8. Use Validation Librariesโ€‹

Consider using well-established validation libraries, such as Validator.js or Yup, to simplify form validation.

These libraries provide built-in validation rules, custom validation functions, and error message handling, saving development time and effort.

As an example:


import * as yup from 'yup';

const schema = yup.object().shape({
name: yup.string().required('Name is required'),
age: yup.number().required('Age is required').positive('Age must be positive'),
});

// Usage
schema.validate(formData).catch((errors) => console.error(errors));

In this example:

  • The yup.object().shape() method is used to define the validation schema.
  • The yup.string() method is used to validate the name field.
  • The yup.number() method is used to validate the age field.
  • The required() method is used to specify that the field is required.
  • The positive() method is used to specify that the field must be positive.
  • The schema.validate() method is used to validate the form data.

9. Accessibility Considerationsโ€‹

Ensure that form validation messages are accessible to all users, including those using assistive technologies. Use appropriate ARIA attributes and roles to communicate validation errors to screen readers.

10. Test and Iterateโ€‹

Thoroughly test your form validation logic with various test cases, including valid and invalid inputs. Continuously iterate and improve your form validation based on user feedback and edge cases.

Conclusionโ€‹

Form validation is an essential part of building a modern web application. It helps ensure data integrity and provides a better user experience. In this article, we've covered ten best practices for form validation in JavaScript. We've also discussed how to implement these best practices in your web applications.

Suggested Tutorials ๐Ÿ“‘:โ€‹

We hope you found this article useful.

Happy coding! ๐Ÿš€

ยท 9 min read

&quot;JavaScript ES6+ Syntax Shortcuts You Should Know&quot;

Introductionโ€‹

ES6 introduced many new features and syntax shortcuts that make JavaScript code more readable and efficient. These modern language enhancements are now widely used and essential for modern web development.

In this blog post, we will explore some of the most useful ES6+ syntax shortcuts that you should know. By incorporating these shortcuts into your code, you can write cleaner, more concise, and maintainable JavaScript.

Suggested Tutorials ๐Ÿ“‘:โ€‹

Let's get started!

1. Destructuringโ€‹

Destructuring is a convenient way to extract multiple values from data stored in objects and arrays. It allows you to extract data from arrays and objects into distinct variables.

1.1 Destructuring Arraysโ€‹

Consider the following array:

const numbers = [1, 2, 3, 4, 5];

To extract the first two elements of the array, you can use the following syntax:


const [first, second] = numbers;

console.log(first); // 1
console.log(second); // 2

You can also use the rest operator to extract the remaining elements of the array:

const [first, second, ...rest] = numbers;

console.log(first); // 1
console.log(second); // 2
console.log(rest); // [3, 4, 5]

1.2 Destructuring Objectsโ€‹

Consider the following object:

const person = {
firstName: "John",
lastName: "Doe",
age: 30,
};

To extract the firstName and lastName properties of the object, you can use the following syntax:

const { firstName, lastName } = person;

console.log(firstName); // John
console.log(lastName); // Doe

You can also use the rest operator to extract the remaining properties of the object:

const { firstName, lastName, ...rest } = person;

console.log(firstName); // John
console.log(lastName); // Doe
console.log(rest); // { age: 30 }

Suggested Tutorials ๐Ÿ“‘:โ€‹

2. Template Literalsโ€‹

Template literals are a convenient way to create strings. They allow you to embed expressions in strings without having to use concatenation.

Consider the following example:


const firstName = "John";
const lastName = "Doe";

const fullName = firstName + " " + lastName;

console.log(fullName); // John Doe

Using template literals, you can rewrite the above example as follows:

const firstName = "John";
const lastName = "Doe";

const fullName = `${firstName} ${lastName}`;

console.log(fullName); // John Doe

3. Arrow Functionsโ€‹

Arrow functions are a convenient way to write anonymous functions. They are more concise than traditional function expressions and do not bind their own this value.

Consider the following example:


const numbers = [1, 2, 3, 4, 5];

const evenNumbers = numbers.filter(function (number) {
return number % 2 === 0;
});

console.log(evenNumbers); // [2, 4]

Using arrow functions, you can rewrite the above example as follows:

const numbers = [1, 2, 3, 4, 5];

const evenNumbers = numbers.filter((number) => number % 2 === 0);

console.log(evenNumbers); // [2, 4]

Suggested Tutorials ๐Ÿ“‘:โ€‹

4. Default Parametersโ€‹

Default parameters allow you to specify default values for function parameters. If a value is not provided for a parameter, the default value will be used instead.

Consider the following example:

function greet(name) {
return `Hello, ${name}!`;
}

console.log(greet("John")); // Hello, John!
console.log(greet()); // Hello, undefined!

Using default parameters, you can rewrite the above example as follows:

function greet(name = "World") {
return `Hello, ${name}!`;
}

console.log(greet("John")); // Hello, John!
console.log(greet()); // Hello, World!

5. Object Property Shorthandโ€‹

Object property shorthand allows you to create objects without having to explicitly specify the property names. If the property name is the same as the variable name, you can omit the property name.

Consider the following example:

const firstName = "John";
const lastName = "Doe";

const person = {
firstName: firstName,
lastName: lastName,
};

console.log(person); // { firstName: 'John', lastName: 'Doe' }

Using object property shorthand, you can rewrite the above example as follows:

const firstName = "John";
const lastName = "Doe";

const person = {
firstName,
lastName,
};

console.log(person); // { firstName: 'John', lastName: 'Doe' }

Suggested Tutorials ๐Ÿ“‘:โ€‹

6. Object Destructuringโ€‹

Object destructuring allows you to extract properties from objects and store them in variables. It is a convenient way to extract multiple properties from objects into distinct variables.

Consider the following example:

const person = {
firstName: "John",
lastName: "Doe",
age: 30,
};

const firstName = person.firstName;
const lastName = person.lastName;

console.log(firstName); // John
console.log(lastName); // Doe

Using object destructuring, you can rewrite the above example as follows:

const person = {
firstName: "John",
lastName: "Doe",
age: 30,
};

const { firstName, lastName } = person;

console.log(firstName); // John
console.log(lastName); // Doe

7. Spread Operatorโ€‹

The spread operator allows you to expand an iterable object into individual elements. It is a convenient way to copy arrays and objects.

Consider the following example:

const numbers = [1, 2, 3, 4, 5];

const copy = numbers.slice();

console.log(copy); // [1, 2, 3, 4, 5]

Using the spread operator, you can rewrite the above example as follows:

const numbers = [1, 2, 3, 4, 5];

const copy = [...numbers];

console.log(copy); // [1, 2, 3, 4, 5]

8. Rest Operatorโ€‹

The rest operator allows you to represent an indefinite number of elements as an array. It is a convenient way to pass an indefinite number of arguments to a function.

Consider the following example:

function sum(...numbers) {
return numbers.reduce((sum, number) => sum + number, 0);
}

console.log(sum(1, 2, 3, 4, 5)); // 15

Suggested Tutorials ๐Ÿ“‘:โ€‹

9. Classesโ€‹

Classes are a convenient way to define blueprints for objects. They encapsulate data with code to work on that data. Classes in JavaScript are built on prototypes but also have some syntax and semantics that are not shared with ES5 classalike semantics.

Consider the following example:


class Person {
constructor(firstName, lastName) {
this.firstName = firstName;
this.lastName = lastName;
}

greet() {
return `Hello, ${this.firstName} ${this.lastName}!`;
}
}

const john = new Person("John", "Doe");

console.log(john.greet()); // Hello, John Doe!

10. Inheritanceโ€‹

Inheritance is a mechanism that allows you to create new classes from existing classes. It is a convenient way to reuse existing code without having to duplicate it.

Consider the following example:

class Person {
constructor(firstName, lastName) {
this.firstName = firstName;
this.lastName = lastName;
}

greet() {
return `Hello, ${this.firstName} ${this.lastName}!`;
}
}

class Student extends Person {
constructor(firstName, lastName, course) {
super(firstName, lastName);
this.course = course;
}

enroll() {
return `${this.firstName} is enrolled in ${this.course}.`;
}
}

const john = new Student("John", "Doe", "Computer Science");

console.log(john.greet()); // Hello, John Doe!

console.log(john.enroll()); // John is enrolled in Computer Science.

Suggested Tutorials ๐Ÿ“‘:โ€‹

11. Modulesโ€‹

Modules are a way to split your code into multiple files. Each file is treated as a separate module and can export one or more values using the export keyword. These values can then be imported into other modules using the import keyword.

Consider the following example:

// math.js
export const add = (x, y) => x + y;

export const subtract = (x, y) => x - y;

// index.js

import { add, subtract } from "./math.js";

console.log(add(1, 2)); // 3

console.log(subtract(1, 2)); // -1

12. Promisesโ€‹

Promises are a convenient way to represent asynchronous computations in JavaScript. They allow you to write asynchronous code in a more synchronous fashion.

Consider the following example:


const wait = (delay) => new Promise((resolve) => setTimeout(resolve, delay));

wait(1000)
.then(() => console.log("Hello!"))
.catch(() => console.log("Error!"))
.finally(() => console.log("Done!"));

13. Async/Awaitโ€‹

Async/await is a new way to write asynchronous code. It is built on top of promises and allows you to write asynchronous code that looks synchronous.

Consider the following example:

const wait = (delay) => new Promise((resolve) => setTimeout(resolve, delay));

const main = async () => {
try {
await wait(1000);
console.log("Hello!");
} catch (err) {
console.log("Error!");
} finally {
console.log("Done!");
}
};

main();

Conclusionโ€‹

In this article, we have looked at some of the most important features introduced in ES6. We have also looked at how these features can be used to write cleaner and more concise code. I hope you have found this article useful and that it has helped you understand the new features introduced in ES6.

Suggested Tutorials ๐Ÿ“‘:โ€‹

We hope you enjoyed this article. If you have any questions or feedback, please feel free to reach out to us on Twitter.

Happy Coding! ๐Ÿ˜‡

ยท 8 min read

&quot;JavaScript Array Methods: A Comprehensive Guide to map, filter, and reduce&quot;

Introductionโ€‹

JavaScript arrays come with a powerful set of built-in methods that make working with arrays more efficient and expressive. Among these methods, map() , filter() , and reduce() are the most commonly used ones.

In this article, we will explore these methods in detail and learn how to use them to solve real-world problems.

Understanding map(), filter(), and reduce() will equip you with powerful tools to transform, filter, and aggregate data in arrays like a pro.

Suggested Tutorials ๐Ÿ“‘:โ€‹

Let's get started!

1. The map() Methodโ€‹

The map() method applies a provided function to each element in an array and returns a new array with the results. It allows you to transform the elements of an array without modifying the original array.

Here is the syntax of the map() method:

const new_array = arr.map(function callback(element, index, array) {
// Return value for new_array
}[, thisArg])

Where:

  • arr is the array to be mapped.
  • callback is the function that is called for every element of arr. Each time callback executes, the returned value is added to new_array.
  • thisArg is an optional argument that will be used as this inside callback function.

As an example:

const numbers = [1, 2, 3, 4, 5];

const doubledNumbers = numbers.map((number) => number * 2);

console.log(doubledNumbers); // [2, 4, 6, 8, 10]

In the above example:

  • The map() method is called on the numbers array.
  • The map() method accepts a callback function as an argument. The callback function is invoked for each element in the array.
  • The callback function returns the doubled value of each element.
  • The map() method returns a new array with the results.

Let's take another example:

const names = ["John", "Jacob", "Julia", "Jasmine"];

const nameLengths = names.map((name) => name.length);

console.log(nameLengths); // [4, 5, 5, 7]

In the above example:

  • The map() method is called on the names array.
  • The map() method accepts a callback function as an argument. The callback function is invoked for each element in the array.
  • The callback function returns the length of each element.
  • The map() method returns a new array with the results.
tip

The map() method does not modify the original array.

2. The filter() Methodโ€‹

The filter() method creates a new array containing elements from the original array that pass a specified condition defined by a callback function. It is ideal for selecting elements that meet specific criteria.

Here is the syntax of the filter() method:


const new_array = arr.filter(function callback(element, index, array) {
// Return true or false
}[, thisArg])

Where:

  • arr is the array to be filtered.
  • callback is the function that is called for every element of arr. Each time callback executes, the returned value is added to new_array if the returned value is true.
  • thisArg is an optional argument that will be used as this inside callback function.

As an example:


const numbers = [1, 2, 3, 4, 5];

const evenNumbers = numbers.filter((number) => number % 2 === 0);

console.log(evenNumbers); // [2, 4]

In the above example:

  • The filter() method is called on the numbers array.
  • The filter() method accepts a callback function as an argument. The callback function is invoked for each element in the array.
  • The callback function returns true if the element is even, otherwise false.
  • The filter() method returns a new array with the results.

Let's take another example:


const names = ["John", "Jacob", "Julia", "Jasmine"];

const namesWithJ = names.filter((name) => name.startsWith("J"));

console.log(namesWithJ); // ["John", "Jacob", "Julia", "Jasmine"]

In the above example:

  • The filter() method is called on the names array.
  • The filter() method accepts a callback function as an argument. The callback function is invoked for each element in the array.
  • The callback function returns true if the element starts with the letter J, otherwise false.
tip

The filter() method does not modify the original array.

Suggested Tutorials ๐Ÿ“‘:โ€‹

3. The reduce() Methodโ€‹

The reduce() method iterates over the array, accumulating the elements' values into a single value. It is perfect for aggregating data or performing calculations on the elements of an array.

Here is the syntax of the reduce() method:


const value = arr.reduce(function callback(accumulator, element, index, array) {
// Return accumulator
}[, initialValue])

Where:

  • arr is the array to be reduced.
  • callback is the function that is called for every element of arr. Each time callback executes, the returned value is assigned to accumulator. The accumulator is the accumulated value previously returned in the last invocation of the callback, or initialValue, if supplied.
  • initialValue is an optional argument that is used as the initial value of the accumulator. If not specified, the first element of the array is used as the initial value of the accumulator and callback is not invoked for that element.

As an example:


const numbers = [1, 2, 3, 4, 5];

const sum = numbers.reduce((accumulator, number) => accumulator + number, 0);

console.log(sum); // 15

In the above example:

  • The reduce() method is called on the numbers array.
  • The reduce() method accepts a callback function as an argument. The callback function is invoked for each element in the array.
  • The callback function returns the sum of the accumulator and the current element.
  • The reduce() method returns the final value of the accumulator.

Let's take another example:


const numbers = [1, 2, 3, 4, 5];

const product = numbers.reduce((accumulator, number) => accumulator * number, 1);

console.log(product); // 120

In the above example:

  • The reduce() method is called on the numbers array.
  • The reduce() method accepts a callback function as an argument. The callback function is invoked for each element in the array.
  • The callback function returns the product of the accumulator and the current element.
  • The reduce() method returns the final value of the accumulator.
tip

The reduce() method does not modify the original array.

4. Chaining map(), filter(), and reduce()โ€‹

One of the most powerful aspects of these array methods is their ability to be chained together, enabling complex data transformations in a concise manner.

As an example:

const numbers = [1, 2, 3, 4, 5];

const squaredEvenSum = numbers
.filter((num) => num % 2 === 0)
.map((num) => num * num)
.reduce((accumulator, current) => accumulator + current, 0);

console.log(squaredEvenSum); // Output: 20

Suggested Tutorials ๐Ÿ“‘:โ€‹

5. Working with Objects in Arraysโ€‹

These array methods are not limited to working with simple values. They can also be used with arrays of objects to manipulate complex data structures effectively.

As an example:

const users = [
{ name: 'Alice', age: 25 },
{ name: 'Bob', age: 30 },
{ name: 'Eve', age: 22 },
];

const names = users.map((user) => user.name);
console.log(names); // Output: ["Alice", "Bob", "Eve"]

const adults = users.filter((user) => user.age >= 25);
console.log(adults); // Output: [{ name: 'Alice', age: 25 }, { name: 'Bob', age: 30 }]

const totalAge = users.reduce((total, user) => total + user.age, 0);
console.log(totalAge); // Output: 77

Conclusionโ€‹

In this article, we have learned about the map(), filter(), and reduce() methods and how they can be used to manipulate arrays in JavaScript. We have also learned how to chain these methods together to perform complex data transformations in a concise manner.

Suggested Tutorials ๐Ÿ“‘:โ€‹

I hope you found this article useful.

Happy Coding! ๐Ÿš€